A projector is one of the most significant needs nowadays that has reduced the requirements of various devices. Do you know how and why? Let us explain to you, a projector is a device that can be used for multiple purposes.
You need to play games and watching movies or dramas can be fulfilled by a projector that delivers you a bigger view and more decadent fun than every person desires.
This popular device is ubiquitous in educational institutes, offices, and even homes due to its late features and updated technologies.
People avoid buying T.V.s, LCDs, and other devices for games separately because they prefer to grab projectors for them.
This affordable yet ultra-featured projector makes a home, mini-theater, and even mini-school; it depends upon your use.
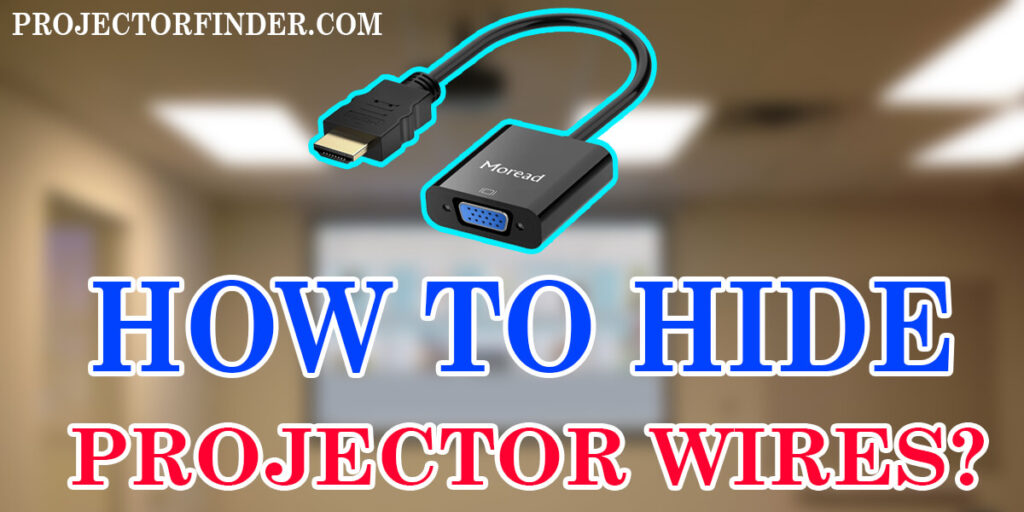
One major issue frowned upon when you have a projector at home is its wires. How to hide projector wires? The hanging cables look odd, so what is its simpler and straightforward solution? Do you also fall on the list of people who are struggling with these questions?
No worries, we are here for you with an excellent guide that is easier to read and comfortable to follow.
Ready, set, and start!
How To Hide Projector Wires
Method 1: Use Covers of Cords- Uncomplicated & Budget-Friendly
The first method we have introduced for people who don’t have much know-how with tools for electronics. This comfortable way is lowest in price, quick in steps, and fast to grasp.
The bulky wires look odd and block your view by coming in front of the projector.
A cord cover is used to hold the wires in one place and completely cupboard. This wire cover is attached to the wall, and the cord moves from the outside and remains invisible.
As a result, you get elegance and solutions together.
The beautiful code saves you from tangled wires that look despicable and odd.
Though this cover protects you from the stress of messy wires, this budget-friendly solution is not invisible.
It means, when you fix this cover on your wall, it is always visible there. You don’t see wires, but this well-arranged and fixed cover.
Method 2: Eliminate the Cords – A High-Level Solution
Why use the cords when you have a well-connectivity projector. Yes, projectors can be upgraded with HDMI and USB technologies that will cost only $50 more. What a fantastic offer!
In this way, the pain of wires will be nipped from the bud. It means no cables and no tension at all!
Method 3: Pass A Wire From The Wall- A common way
Passing projector wires is also one of the DIY steps that are very common and easy to perform. In this step, you need to pass the wires from the wall like many other wires.
It is suitable for those who are constructing new homes or renovating. With electrical wiring, they also get this wire set.
A low cost and effortless way!
Method 4: Use of Furniture- Creative and Simple
In this process, you don’t set your wires on walls or ceiling. Here you use your furniture and cabinets to make your wires hidden. That is a great and reliable way. Here you don’t need to pay much expense.
You can easily buy a big tape, tools, and many more things to manage wire properly without significant expense or construction in this fruitful way.
In this way, you can get complete entertainment without putting much effort into repairing or construction.
Method 5: Use Soundproof Material- Expensive but extreme Fruitful
Soundproof material serves double duties; bring that material to get double fun.
The people who have installed their soundproof wires in the ceiling and wires can get their projector’s fire fixation as well.
These were the five methods to hide the wires; let’s have more effective tips:
Hiding Projector’s Wires – Some More Useful Tips
The above mentioned are the ways to hide the projector cords. These methods come with different steps, shortcomings, and advantages. But, the creativity doesn’t end here. You may get a unique idea through this guide.
You can integrate your home cables to decorate a creative and picky way to hide the wires. There is not any way that is fit in every way with everyone, and the following options will give you more clarification and help you to have a quick selection:
Get more information about hiding the cables, projector size, your budget, and home needs:
Budget: think about your account, how much you can afford for cover and labor. In this way, according to the store, the selection of methods will become easy. If you have an idea about electronics, you can perform fixing on your own, and the investment will be only on buying the cords.
Create a Layout: If you are creative enough or get some creative ideas from somewhere, you can make a great layout through wires by saving money and adding creativity at home. Your annoying wires will become your most prominent means of decor.
How Much Modification You Can Afford at Home: If you live in someone else’s department, you can not do the drilling.
How Much You Want To Hide Your Wire: Many people don’t want to see wires at all, and they look for a solution that hides the cables entirely, while some want to hide a part only to avoid a mess at home.
Bottom Line:
The projector is a basic need of this age period because it offers significant advantages to its users at a small price that inspires everyone.
But, there is a little yet bothering issue with this revolutionary device, its pesky wires. Don’tDon’t feel odd, and it is a fact!
To reduce the user’s effort, we have also offered possible solutions to these irritable wires. These solutions are of different types and different budgets.
You can choose the one that suits you- budget, space, and need!
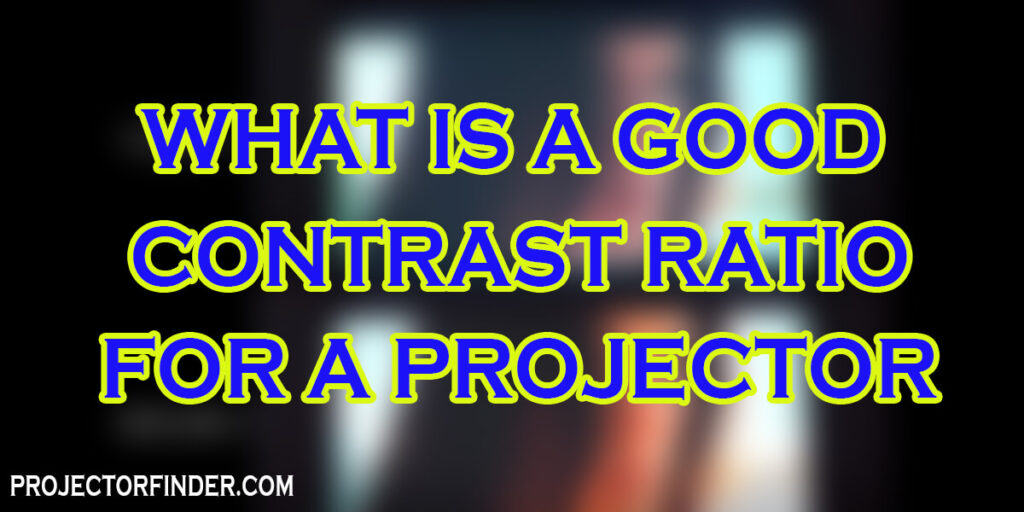
The first and foremost important thing that matters in a projector’s image quality is its “Contrast Ratio”. Since now you are having a projector, it’s important to know how you can get most of the purchase yield in expressions of image quality.
Every of single detail matters in image quality. How and what is a good contrast ratio for a projector is a question that disturbs many projector users. From perfect resolution to correct vibrancy and sharpness, everything has its importance in its shoes. All these balanced things together, give us the desired image quality. However, the game-changer card in the game is the Contrast Ratio.
What is Contrast Ratio
Before we tell you the best contrast ratio for your projector, first let us see what contrast ratio is. There is no such hard and cold definition of contrast ratio: don’t panic.
The contrast ratio is the difference between the white and black light of the image expressed by numbers. To better understand this, you need to understand that the sharpness of an image is at its high peak when comparing the whitest and the darkest light of the light.
The come out contrast ratio of this is will be 1000:1. Where represent the white side of the picture and 1 as the dark side. Similarly, if you have 3000:1 then, 3000 is the white contrast and 1 is the dark one.
So, What Is a Good Contrast Ratio For a Projector?
Well, according to the good rule of thumb, the best and the most recommended contrast ratio is 10,000:1. This contrast ratio is best to avoid every wear and tear.
“The higher the contrast ratio, the better will be the image quality.”
However, this contrast ratio will also be affected by the surrounding. If you use this ratio in a dark environment, then you will notice that the image quality is extremely impressive as you may think of it. For better experience and results, spend some time in your environment to figure out the desired contrast ratio.
Note that, every person has its likes and dislikes. This recommended will prove to be best for some people, while for others it may be just so so.
9000:1 contrast ratio is also a good one. But as mentioned above, some may find it okay, while others take it as a bit off. Personal experience and preference will win in the end.
Why Is Contrast Ratio So Important?
Many people ask that why do I even care about contrast ratio, mean is it that important? To all the people out there who have the same question (even if you), the simplest and the honest answer is, Yes, its Hella important to maintain the contrast ratio of the image.
Think honestly what is the use of having an image quality that doesn’t even show the image properly? According to the good rule of thumb once you spend your money on any product, and then it is your right to get the best outcome from it.
What Affects the Contrast Ratio?
The biggest enemy of contrast ratio is none other than “Light.” A little amount of room light or any other outdoor light is enough to destroy the settled contrast ratio. Either you have a 1000:1 or 10,000:1 ratio, just turn on the light, and then try to distinguish between them.
Try the following method to keep the contrast ratio maintained.
Cover the windows: Try your best to eliminate all the outdoor light coming from the windows
Turn the light off: Keep the dark as possible
Dark walls or ceiling: As mentioned above, the darker the room, okay will be the contrast ratio
Lastly, even after trying all these mentioned ways, the contrast ratios remained disturbed, and then try some electronic techniques to increase the contrast ratio. Or you can go with the second option of having a bright projector.
A bright projector can reduce the effect of explosive light but cannot eliminate it.
There are two common ways to measure the contrast ratio. The first is ANSI contrast and the second is On/Off contrast. The first method “ANSI Contrast” is the valid method to measure contrast ratio. This method is hard to handle only used by some manufacturers. While on the other hand, the On/Off method is the easiest one, but it gives false readings. Let us see the difference between them.
1. On/OFF Contrast
The On/Off contrast measure reading by measuring the brightness of the white block of the IRE trial design (on) and the brightness of the black block of the IRE trial design (off). The outcome 10,000:1 contrast ratio will indicate the ratio of white is 10,000 xs brighter than black.
2. ANSI Contrast
This method is a more advanced and accurate one. ANSI contrast doesn’t use the IRE test pattern method; instead, it uses a checker rectangular board. The rectangular board is consisting of 8 black blocks and 8 white blocks. The brightness of the white & blocks are measured than an average is calculated. After taking the average values, the ratio is calculated.
The calculated ratio is known as the ANSI Contrast.
Conclusion
We do hope that after reading this article your all queries must all solved. In this article, we give you detailed information about what is a good contrast ratio for a projector and how to calculate it.
Figuring out the best contrast ratio for a projector is not such a difficult task. We have mentioned the methods to calculate it.
To enjoy a good image quality, do maintain the contrast ratio. The contrast ratio is the actual game changer of image quality.
Lastly, every person will prefer a different contrast ratio per its taste and priorities. Do figure out your preferred contrast ratio or try our recommendation.
So you are here to find the best way to clean the projector lens, sounds impressive. Well, we have to admit that a dirty and smudgy lens spoils the quality of the image. Like any other household item, the projector lens needs our attention to clean often.
Okay, first, don’t assume it is a difficult task. Cleaning projector lens is children’s play. Without wasting your precious time, put on your gloves, and get into the game.
Best Way to Clean Projector Lens
Believe it or not, cleaning the projector lens is a very easy task. Or we can say that it can be done even by a kid. Here are the four steps that will lead you to a clean and crystal clear projector lens.
Don’t skip any step if you want to enjoy a clean lens inside out.
Step 1: Cleaning Preparations
So you have stepped into the process of cleaning the projector’s lens. The first step you need to take is to make sure that the projector is completely cooled down.
During usage, the lens is warmed up easily. So if you have used the projector freshly, then switch it off and remove all the cables. Let the projector cool down completely for at least 30-60 minutes. Cleaning the projector’s lens without letting it cool down results in scratches and damage.
Now following things you are gonna use while cleaning,
Lens cleaning Clothe
Compressed Air Spray
Lens Cleaning Solution
Tissue paper
Cleaning Brush
Step 2: Open the Projector
Well, this step is optional. It is only mentioned here for those who want to clean the lens from the inside as well.
To clean the inside of the lens, you have to open the projector. Note that the opening of the projector will vary, based on the brand. Every brand has different ways of opening the projector. To check the way of opening your projector, see the user manual. In some projectors, a button is also present for the opening.
Step 3: Gently Clean the Projector’s Inside
After opening the projector, take the compressed air spray to remove all the dust. Carefully use the spray and keep it at least 4 inches away from the projector.
Now the second thing you need to do is to use a soft cleaning cloth to wipe the dirt and moisture. Dirt usually accumulates around the moisture; make sure to wipe it properly by using a cleaning cloth.
Step 4: Clean the Lens
The last but the most important step: cleaning the lens. Since you have cleaned the inside of the lens and projector, now learn how to clean it externally. First, remove the lens cap and clean the dust by using compressed air spray.
After cleaning the dust, take the lens cleaning solution and drop only 1-2 drops of it on the cleaning cloth of the lens. Now gently clean it. Clean it in a circular motion, starting from the center to the edges. Similarly, if you are using a cleaning brush, then use the same procedure to clean it.
Disclaimer: Remember that only 1-2 drops of lens cleaning solution are enough. The more you use, the harder it will be to clean it. And also, never put the cleaning solution on the lens. Always drop it on the cleaning brush or cloth.
Lastly, put the lens cap back on it.
Things to Avoid While Cleaning Lens
Some users do follow desi myths to clean the projector lens and end up damaging the lens. So if you don’t want to damage your lens, then try to avoid the mentioned things.
Never Use a T-shirt: No matter how silky & soft a T-shirt you have, never ever use it to clean the projector lens. Use only a lens cleaning cloth if you want to avoid scratches formation.
Don’t Use Any Cleaning Solution: Use only lens cleaning solution for lens cleaning. A big no-no for any other household glass cleaning solution. Because those solutions will have a different chemical composition which can damage the lens.
Never Use Breath to Clean the Lens: Yeah don’t be a desi man who tries to clean the lens by their breath. Use a proper hygiene method to clean the lens.
Don’t Touch the Lens: Repetitive touches on the lens will leave your fingerprints on it and make it smudgy and dirty again. Try to avoid touching it as much as possible.
Clean your projector lens as soon as possible if you want to enjoy the crystal clear image. The best way to clean the projector lens is in your pocket: make sure to use it professionally.
Lastly, don’t forget the precaution list that we have mentioned.
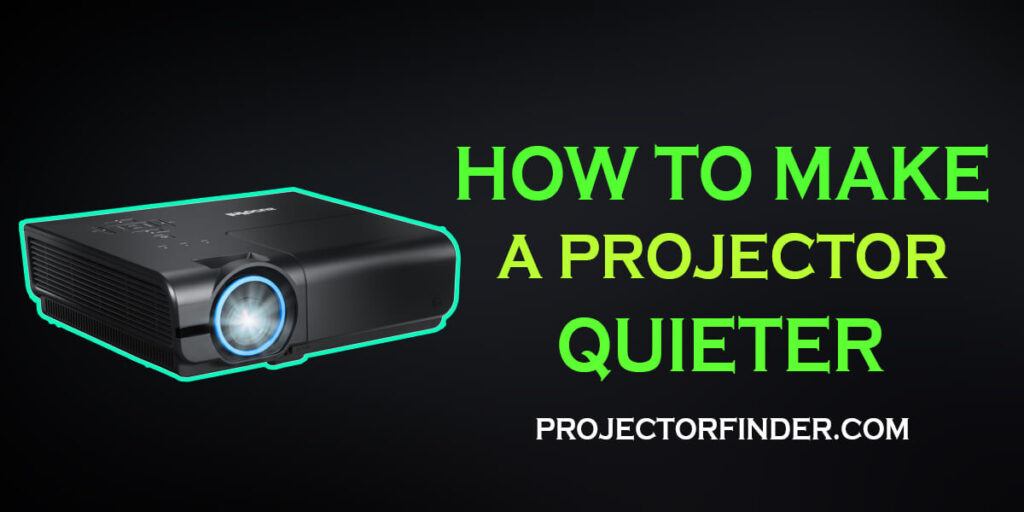
Cleaning your room, put in necessary stuff like snacks, and drinks, and get ready to enjoy a movie night in a cozy environment. But wait! What is that sound? Is it coming from your projector? Please don’t! Noisy projectors always spoil the quality of movie nights.
Not only on movie nights but also in meetings and online classes, a noisy projector cut down the presentation quality. There should be some ways where you can learn about how to make a projector quieter. If you are looking for a solution, then you are at the right place.
Here we have managed to provide you with the most authentic and valid information. Provide yourself benefits by using the given ways. And make sure to enjoy the best 4k projector experience.
Why is My Projector So Loud?
The main cause of your projector’s noise is the cooling fan turning on. Some projector components can become hot when used; a high temperature will cause your projector to work harder and be noisier.
4 Ways to Make a Projector Fan Quieter
Having a noisy projector is not a problem anymore. These provided ways are the best in the business.
But before we get straight into the topic, there is one thing that you need to know. Every projector is different from one another. Some projectors are designed in a way that they produce little noise. While on the other hand, some projectors (mostly the old design) produce way more sound than the others.
So if you are having the old version of the projector, then yes, there is a need to learn how to make a projector quieter. And if having the new one, then still learn it because you will need it somehow in the future.
1. Clear the Dust from the Vent
No matter how much you clean the projector from the outside; there are still some dust particles that manage to enter the vent of the projector. Those dust particles not only disturb the fan but, also heat up the projector easily.
The science behind this is that dust particles accumulate around the fan when they enter through the vent. The fan which is running to cool the projector makes noise due to the accumulated dust. And due to improper running of the fan, the projector in returns heat easily.
2. Change the Position of the Projector & Use Eco Mode
Want to know the easiest way to wipe away the problem right away? Then just move the projector away from you! That’s it. You will complain about the noise problem till you are experiencing the issue. Once the issue will move away from you your complaint will also end right away. In case you still experience noise problems, then install a hush box.
Now let us talk about what will be the benefit of using Eco Mode on the noise of the projector. If you want to enjoy a quieter projector, then nothing can be more significant than switching to the Eco Mode of the projector.
The Eco mode of the projector is way less bright than the normal mode. In the Eco mode, the engine of the projector work less, and the need for a fan to cool the device is also less. Hence the fan works less and makes less sound! As simple as this.
3. Cool the Room and Put a Fabric on the Wall
As mentioned above that the noise is due to the fan of the projector which is trying to cool the device. If you keep the projector in a cool room then you can avoid the noise up to a great level.
A well-air-conditioned room will keep the projector at a normal temperature. And the fan is no more required to run further and make noise.
Since you have maintained the temperature of the room, now it is time to put a piece of fabric on the wall to evade the reflection of sound. Basically, hard and stiff walls reflect the sound while fabrics absorb the sound.
If you put the fabric on the wall then you’ll be amazed by the quality of the sound. However, it is not possible to put fabrics in meeting and conference rooms, but still try to put them where possible.
4. Install a Hush Box for the Projector
Installing a hush box is the best way to avoid noise production. Sound disturbance greatly affects the viewers’ experience. Hush boxes are the best option because they allow better air conduction to the projector.
It has been noted from a series of studies that when projectors are kept in the hush boxes, they produce less sound as compared to those projectors who run without the hush boxes.
Okay, there is some possibility that you may think about how to get a hush box and how much will it cost? Well, don’t worry! You don’t need to purchase a hush box because you can easily craft it at your home! Yes, you heard it absolutely right. YouTube is full of DIY videos regarding the hush box. So make sure to watch the most useful video.
Conclusion
The noisy projector is the issue of every third person, but knowing the solution to it is the talent of only a few people. Here in this article, we shared with you the 4 easiest ways of making a Projector Quieter. The most amazing thing about these tips is that they don’t even cost a single penny.
Try making the projector quiet by cleaning the vent of the projector. Dust is the only element that causes noise in the projector. Even if after cleaning the projector, the noise issue is still there, then try the second way of changing the position of the projector. The farther the projector will be the more relaxed you will be.
Lastly, make sure to use the mentioned ways in a proper manner. Don’t put the projector so away from you that it spoils the video quality, and also use a high-quality fabric to get the sound absorbed correctly.
The how-to things are pretty impressive to cover because it just does not let you educate what the folks need to learn the whole process but gives the perfect learning experience to those who are writing the one. 🙂
And, as you all know, we are avid lovers of the Projector and love to tackle it from different angles and methods to educate everyone around us.
Today, we are up with another exclusive How-To Guide for the Projector to bridge with the all-time favorite technological device you would be surprised to know about — And that goes with how to connect Macbook and Macbook Pro to Projector even you you do not possess the first-hand experience either of the devices; Macbooks and the Projector as well.
It is well acknowledged that the techie guys’ world is fast evolving towards deploying the macOS rather than the WindowsOS despite its complex user experience and hard to learn to actually and seamlessly use this powerful machine.
Okay, you might be surprised why we are covering the whole Macbook? Did I offend you to share some info about Macbook? Of course, Not. 🙂
Bridging the Projector along the line with a Macbook, consider it adequately DONE.
How to Connect Macbook and Macbook Pro to Projector
A Macbook is totally different from a Macbook Pro; therefore, the possible connection to integrating a projector with two of the devices would be moderately different.
Let’s pick ’em up from the nose!
How to Connect Macbook to Projector
See, the plain and simple ‘Macbook’ is what we mean here (expect no fancy down here!)
While it is not sane to jump towards the straightforward process called the ‘connection’ between the Macbook (simple) with a projector, first, we need to understand and collect what actually is required down here.
Please turn on the Projector and let it fully loaded after switching the power button on.
Either your Projector got VGA or HDMI (does not matter here), get the cable right from the Projector, and plug it into Mac’s port dedicated for VGA or HDMI (whichever port you are using.)
Get help from the Mac Adapters if you hit any kind of trouble in establishing the connection and the Mac adapters come to the rescue. The ‘USB-C VGA Multi Adapter‘ and ‘Apple Mini DisplayPort to VGA Adapter‘ would ease the job.
Now that you have both of the devices connected and synced up, now click on the Apple menu from the top-left of your Macbook.
Go to the System Preferences out of the drop-down menu.
Get to click over the Display icon.
Hop for the Detect Display button and make a quick click (why acting slow!)
At this time and the point, your Projector and Mac should be all readied, synced up, and must be delivering the content by now. Congrats!!
Oh no! THEY are still not working and displaying any sort of content, but the black screen is all that can be seen on the Projector. Do NOT worry at all; we got the solution, or better call, the troubleshooting steps to clear the issue out.
Troubleshooting: Connection between Macbook and Projector ain’t working
Ensure you have all the cables fully attached on both devices and are not left loose.
After checking and assuring that, it is time to look for the settings again.
Now, go hit the Apple Menu from your Macbook and then select System Preferences from the menu.
Go to the Displays icon and then the Arrangement tab afterward.
Do check the Mirror Displays box that you would be able to detect from the lower side and to the left-hand corner.
As you have checked the box, wait for a couple of seconds, and you would be able to see an identical image displaying on both of the screens of your Projector and Macbook.
So, congratulations! That seamlessly takes you to connect Macbook to Projector in one single attempt (expectedly!)
See, the Macbook Pro is a lot different from the plain and simple Macbook (which Apple’s family introduced.)
And the Apple Macbook Pro was first introduced in 2006 and still has been dominating the world of computers by contributing its most significant chunk due to the popularity and still is in demand arisen by the techie folks wanting to get a hold of it to look classy and smarty!
There is a lot to say and speak about the Macbook Pro, but we got one primary job to get done with its help — Connecting the Macbook Pro to Projector.
On a serious note, we do not care what the Macbook Pro possesses *jokingly* as long as it is all set to connect with our precious Projector to upbeat our entertainment time.
Unlike the Macbook connecting with the Projector, it is about the same processes that you would observe this time when hooking the Macbook Pro with a Projector.
But before moving ahead, it is certain we need some sort of the preparations to go through to ensure we have all the basic and required stuff at our disposal not to look numb when the connection is being established (and, really NOT wanna feel embarrassed in front of ANYONE.)
What we need here is;
A Macbook Pro
Ownership of the Projector (a must!)
VGA and/or HDMI cable
Apple Display Adapters (the workaround here)
Now to the process;
Power up your Macbook Pro.
Get the Projector turned on.
Now, using the VGA cable coming off from the Projector that goes into the Projector, let’s do it.
Or if you got an HDMI cable, do it the same way.
At the time of needing and acquiring the assistance of Apple Display Adapters, that is not entirely a worrying sign. All you need is to find the supported and original Apple-made display adapter, and the following would work;
USB-C VGA Multi Adapter
Apple Mini DisplayPort to VGA Adapter
USB-C Digital AV Multi Adapter (for HDMI)
Apple Mini DisplayPort to DVI Adapter (for DVI)
Apple HDMI to DVI Adapter
Once the ports are filled with the cables, go to the Apple icon from your Macbook Pro and then click over System Preferences.
Now to the Displays.
And then make a click on Detect Displays. Once you have clicked, the Macbook Pro’s screen should be displaying up on the Projector in a second or two. In case it does not, keep the Source button pressed up from the Projector until the Macbook Pro’s screen does not show up.
Why do you even need to connect your Macbook with a projector?
Well, you should get your own reasons to connect your Macbook with a projector for the countless ones…
Starting with it, we are sure the Macbook and Macbook Pro are quite handy, lightweight, and portable to move around, so are the particular types of the Projector that are exclusively designed for enough portability.
But setting up the Projector in the outdoor location is quite simple even though it is not rated for portable use, but operating the Projector could bring a lot of stress.
And to entirely deal with the situation, the Macbook and Macbook Pro are the right option to bring in the video source to push the Projector to display what you need to watch.
Still, the reasons could be quite different than the scope down here.
Not just it helps to throw out the entertainment content to accommodate the large pool of folks gathered in your backyard and enjoy the party, we got several other reasons where Macbook computers are a good fit.
MacBook and Projector in office
See that! This is where the Macbook is quite common to be seen and is called the office.
In today’s world, the offices are the prime location where Macbook and Macbook Pro are thought to be coming up to emit its efficiency to the best, and under the meeting rooms, the typical way to hop on the Projector is to actually get the Macbook connected with it to stream through the presentations without needing to buy any external and dedicated devices to first load ’em up with the content.
So, any of the random and work-oriented Macbook would do a lot better of the job here without costing anything to the bill.
MacBook and Projector in Universities
Another advanced use we can ever find by seeing the Macbook assisting in university classes.
For a bright example, imagine the class full of students (around 100) and the blackboard or whiteboard is quite a task to be seen from the distance where many of the universities have decided to change their way of teaching by adopting the latest technology.
And the latest technology that consists of the Projector (majority) to bring its widescreen to fully cover with the ability to zoom in and out at request has dismissed the complaint of not seeing anything heavily.
With the Macbook and Macbook Pro, the teachers find it quite efficient to load up the teaching staff to present in front of the jam-packed classroom without sacrificing productivity.
Some more on it…
All in all, the use of the Projector is always beneficial under various circumstances given the fact you have a lot of bigger screens at your disposal, and the latest projectors rarely ask for maintenance, which is an excellent money-saving technique while enjoying the content on the big and widescreen!
And hooking them up with the Projector is quite a move just because of the reason almost everyone owns this smart computer and putting it on the bigger screen is not less than the advantageous task under the situations you would feel super proud to be spare (to not invest a single dime of money.)
Both known to be the equipment of the familiar places such as offices, seminars, home, school, churches, universities, outdoor parties, pool parties, family gatherings, and more; the use of Macbook with Projector would always bring you the benefits to make the job done effectively and smartly.
Conclusion of how to connect Macbook and Macbook Pro to Projector
And here, we reach the conclusion of how to connect Macbook and Macbook Pro to Projector by covering it in its broadest details, emphasizing the troubleshooting steps to fix the common issue that hinders them from getting synced up.
Not a word of alien, the phenomenal grown of Macbook has proved this thing from Apple isn’t meant to die down soon whereas, the Projector has been observing its boom in the developed countries where it has been tackled as the core and primary part of the daily lives of their consumers commonly adjusting and fixing them not for the business and educational purposes but for the home usage as well.
Unlike its booming trend marching towards the chart’s iceberg, there are still millions of daily users who do not quite possess the knowledge of hooking both together; Macbook and Projector.
So, we deem it as our obligation to cover it for those who lack this simple-to-learn technique to connect both up and together.
Take a chance and set up the connection, which does not seem any complex to follow. All you have to do is the trust that it would not hurt anyone to try following out, the concept of the process, recognition to the ports from Macbook and Macbook Pro as well as the Projector, knowing the right set of the cables, and of course operating the Macbook and Macbook Pro along with the Projector to understand the purpose of buttons and functions.
Go modern and go wireless; if that is how you roll, you might be well interested in exploring how to connect your phone to a projector wirelessly.
And why would you? The hassle of connecting the cables… Limited range. On top of that, the ease of enjoying the projector just dies down when the folks still switch to the old-fashioned and back-dated mechanism to operate the projector with.
For the same reason, the wireless era’s commencement is all-set and suited for everyone to enjoy clutter-free entertainment. It just takes power to power up your projector, and that comes into your full control, where you get to navigate everything out of the projector using your little smartphone.
See the portable projectors being operated with your phone on the outdoor location; you are so useful to enjoy your time outputting the best entertainment! And the same applies to different conditions and situations where you are forced to use/connect your phone with the projector.
So, let’s learn how the connection of the projector with the phone goes all wirelessly!
And we would commence with the step-by-step process covering the Android and iPhone separately.
Oh yes, the phone is the phone, but Android and iPhone are totally different; hence the technology and connectivity used because of being totally identical from each other. And that is the very reason to cover them both separately.
How You Can Connect Android Phone to Projector Wirelessly
Before digging deep, we first need to collect and put up the required instruments to make a successful connection with the projector wirelessly.
What we require
An Android phone (of course, who can forget about that? 😀
Get Miracast (device), Chromecast (device).
Connecting wirelessly with Miracast
To have it set up through Miracast, the first step is to actually download the Miracast first on both devices, your Android and the projector.
In a situation where the projector does not have the built-in Miracast functionality while your Android phone does, do not worry about that at all.
Purchase the Miracast video adaptor that goes into your HDMI port up on the projector to make the wireless connection established between the phone and the projector with ease.
And how really connect the Android phone using the Miracast through the Miracast video adapter? Let’s follow this simple guide;
Get the Miracast Video Adapter online or from the local store.
Plugin the Miracast device upon the HDMI port and the power cord on the USB port, then turn on the projector.
Now, connect the smartphone to the Miracast by tapping the ‘Cast’ button you can find on your phone’s notification bar.
Tap on Miracast’s name and wait for a bit to get your phone fully mirrored and being seen on the projector.
That is all it takes to connect the Android phone through Miracast wirelessly.
Connecting with Chromecast
Okay, we understand your projector does not support Miracast, and the second and most-common alternative is to employ Chromecast made and offered by Google itself.
Known for delivering the high-end and qualitative image in 4K and UHD, watching the content through Chromecast makes the whole experience fabulous for you.
By the way, hooking the Chromecast with the projector to utilize the phone is far more convenient than the many tried methods, so it just takes merely a minute to get it all set up quite successfully.
Let’s get the Chromecast device hooked into the HDMI port that you would generally find from the back of the projector.
Turn off the ‘Power Saving’ mode from the phone (it is the must, or else you would lose the quality of the image)
Get your phone as well as the Chromecast to connect with the same wireless network to allow it to sync up together.
Then download the Google Home app right on your phone.
When downloaded, tap on the ‘Menu’ and move to ‘Cast Screen.’
On the second window, get to select the name of your Chromecast device and have the content start displaying up on the projector screen.
How to Connect iOS Phone to Projector Wirelessly
Believe us, that is one heck of a simple method to get the iPhone connected with the projector all wirelessly to cast what you got up on the iOS-backed iPhones and iPads!
Well, mirroring the iOS phone and iPad is quite simple to do so, but how exactly to get it done; that is still the myth to many.
For us, that takes just less time to get it all set up.
Enabling the AirPlay over the iPad/iPhone, just go to the bottom of the page and swipe up a bit
The soonest you can see the AirPlay icon, tap over it
Now, select “Apple TV,” and you are good to turn on the mirroring function.
What if your projector got to support HDMI. And in case if it does not, nothing to get worried about, and you only see the VGA port, do not mind at all.
Get the HDMI to VGA converter/adapter the soonest. The soonest you gather the stuff up and together, the HDMI to VGA adapter goes into the VGA port found on the projector the ONLY–HDMI ones seem to be found bearing the ultimate convenience.
Conclusion of how to connect phone to projector wirelessly
Thankfully, the search is finally over — the method is cleared and determined, and that takes you to solve the riddle of how to connect phone to projector wirelessly.
Because the wireless is the new face of an era where almost all the products and technology have been moving around to get stuck with wireless connectivity even though the old traditional methods are still dominant around the world.
Let’s get to spend some of the money over the newer technology and feel the difference of getting rid of cables’ clutter to ensure you will never see ’em for sure.
So, happy mirroring the screen AND enjoy your iPhone and the Android phones to the max of the entertainment!

 Cleaning your room, put in necessary stuff like snacks, and drinks, and get ready to enjoy a movie night in a cozy environment. But wait! What is that sound? Is it coming from your projector? Please don’t! Noisy projectors always spoil the quality of movie nights.
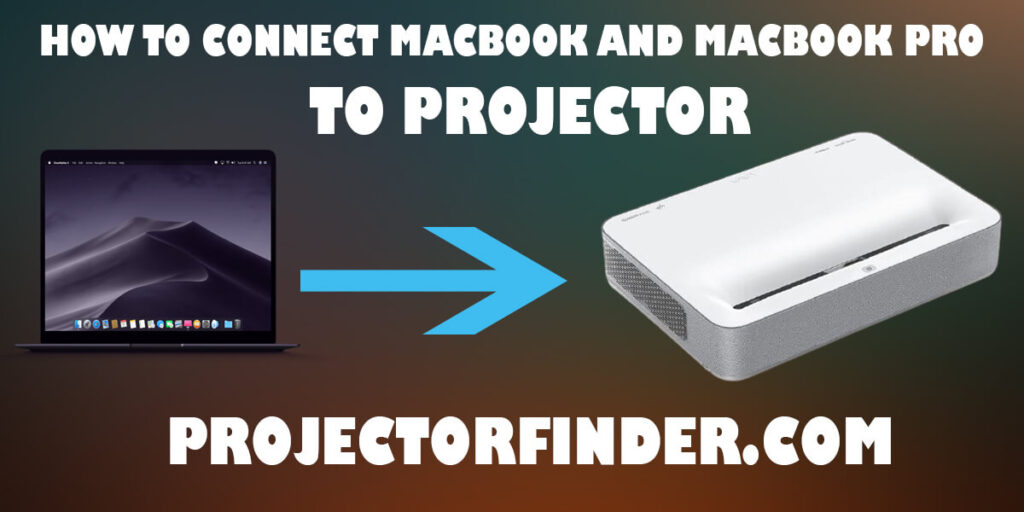
![How to Connect Phone to Projector Wirelessly [ IOS + Android ]](https://projectorfinder.com/wp-content/uploads/2020/11/How-to-Connect-Phone-to-Projector-Wirelessly-1024x512.jpg)