How To Project Image On Wall From Phone

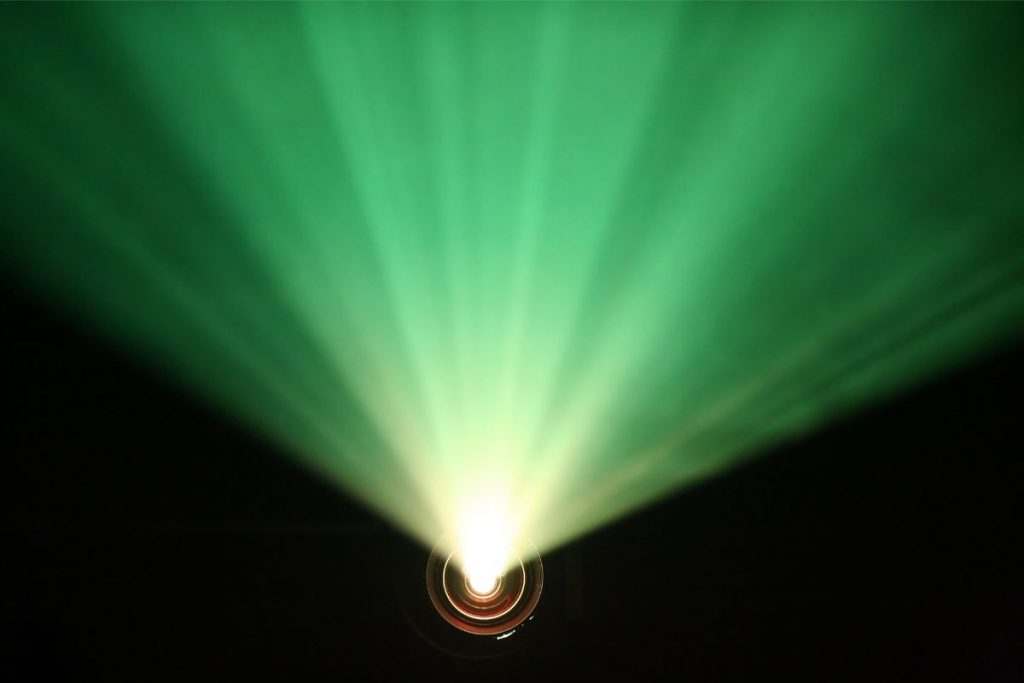
When you have a good projector, projecting images is naturally very simple.

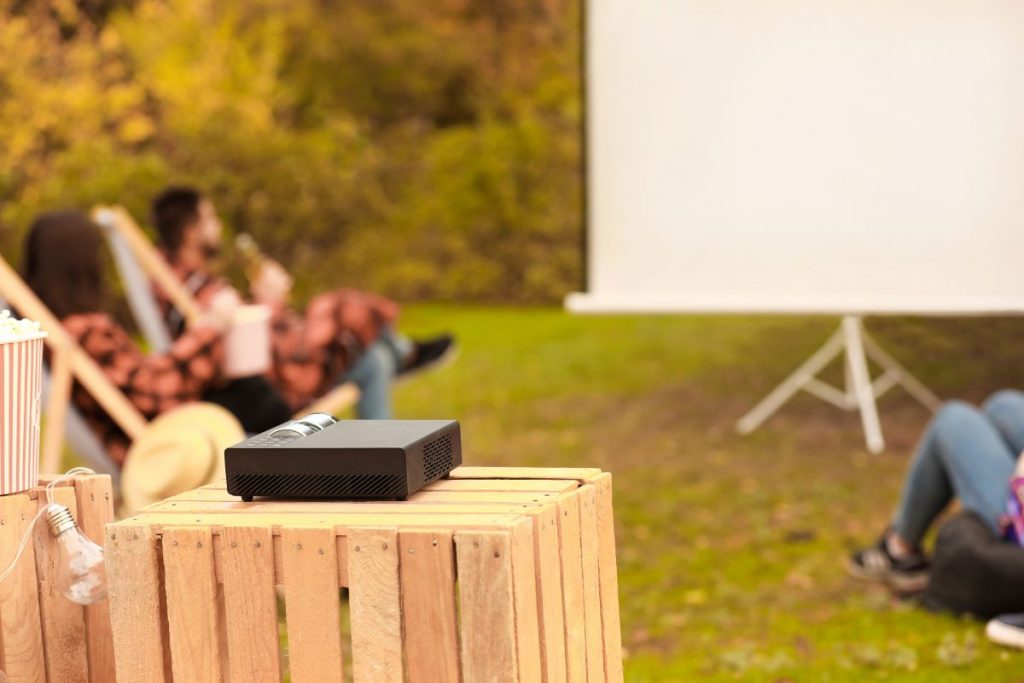
If you’re a big movie fan or just want to emphasize smaller image details on a screen then the idea of owning a projector is very appealing. 

But what if you’re unable to afford a projector right now? Well, you can still keep your projecting dreams alive by projecting an image onto a wall with a smartphone or flashlight!

This actually isn’t as hard as it sounds and offers a pretty decent projected image. But how do you do this exactly? Let’s find out!

Using A Flashlight To Project An Image

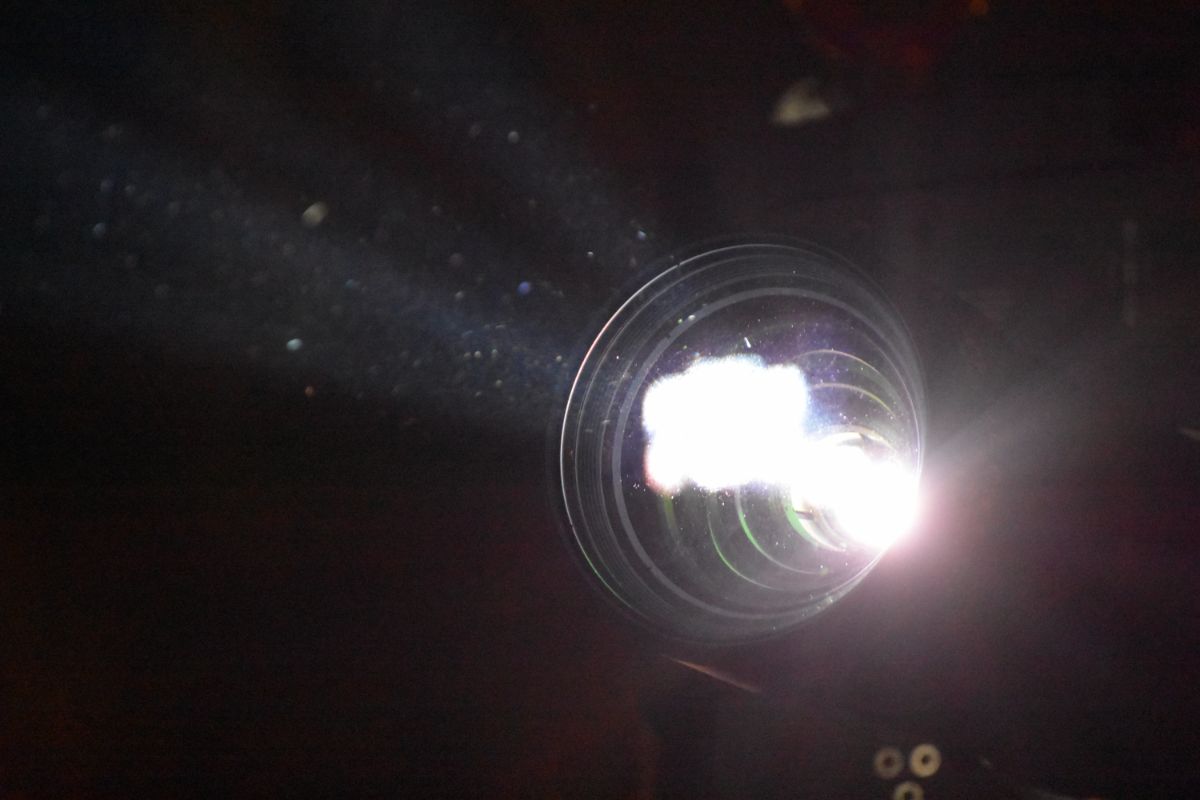
To project an image on a wall with a flashlight, simply point the flashlight at the wall and cover the front of the flashlight with a Fresnel lens, or magnifying lens. 

Then switch the light on so it can shine through the lens and voilà! The image will be projected onto the wall.

You will also need to adjust the position of the lens so it can focus on the image. You will need to adjust the lens until you achieve the image quality and size you want.

Using A Smartphone To Project An Image

It’s safe to say that smartphones have undergone a massive evolution over the years, and can do even more than making calls and provide us with access to the internet.

However, it may come as a surprise to some to learn that you can also use your smartphone to project images onto a wall. 

It’s important to stress however, that no smartphone has a projector configuration already built in.

However with a few tweaks you can still transform your smartphone into a DIY projector!

What You’ll Need

  • A shoebox.
  • A brush
  • Matte black paint, or if you can’t acquire this, thick black paper.
  • Double-sided tape
  • Glue
  • A magnifying glass
  • Mirror
  • Pencil
  • Precision knife/scissors
  • Ruler

Step 1: Find The Correct Box And Mirror

You will need to place your mirror and the magnifying lens into the box in order to assist the ray of light from your phone in creating a large image projected onto the wall. 

For a bright final image, a lot of light needs to make it to the magnifying glass.

Plus, you will require a rather long box so you can change the distance between your phone and the projecting lens.

Generally, you’ll require a box that fits your screen. You will also need a rectangular, plain mirror that is the same size as your smartphone. 

Step 2: Make The Inside Dark For The Best Image Quality

Using a precision knife or scissors cut one narrow side of the outer box and the box’s lid.

You’ll find that the light that reflects from the walls  of the box will create an image noise which will lower the quality of an image. 

To avoid this, coat the inside of the projector with black matte paper by simply sticking black matte paper onto the interior of the projector.

It’s rather simple to evenly spread the glue on the matte paper with a brush. 

If you can’t get your hands on black matte paper you can also paint the box, allowing it time to dry.

Step 3: Install Your Lens

Take out the handle of your magnifying glass before tracing the outline in the middle of the narrow side you cut out.

Using a precision knife, cut out the outline so you can fit the magnifying glass into the opening. 

Step 4: Create A Focus That You Can Manually Adjust

Step 4: Create A Focus That You Can Manually Adjust

An adjustable focus means the lens can be moved with your smartphone. You can make the focus better by building a second box that fits into the outer box.

When you’ve created a second box you will also need to fold four sheets of black paper that can fit into the box’s edge. To make sure your measurements are precise use a ruler.

Then make some cuts – not too deep – at one edge and fold the flaps.

With some glue add the opposite sides of the flaps to make the box more solid. Finally, glue the lens to the inner box flaps. 

Step 5: Place The Mirror In The Cardboard Phone Projector

Now you have set up a DIY projector that projects an image from left to right, and can also be turned upside down.

It’s pretty easy to turn the image upside down. You just need to switch off your phone’s auto-rotate settings.

Projecting the image left to right can be done with a mirror, which you can do by situating the mirror at a 45-degree angle.

The mirror should be propped against the edge opposite the lens.

Step 6: Make A Window

Measure your phone’s screen and then use these measurements to draw a rectangle on the lid of the projector above the mirror.

Using a precision knife you can then remove the rectangle. 

Lastly, place the magnifying glass into the opening you made in the third step of the process, and there you have it!

A DIY phone projector! You can also personalize your phone projector with different color paint and some shiny material. 

Final Thoughts

In many workspaces or public spaces, a projector is a crucial piece of equipment that many organizations would be lost without.

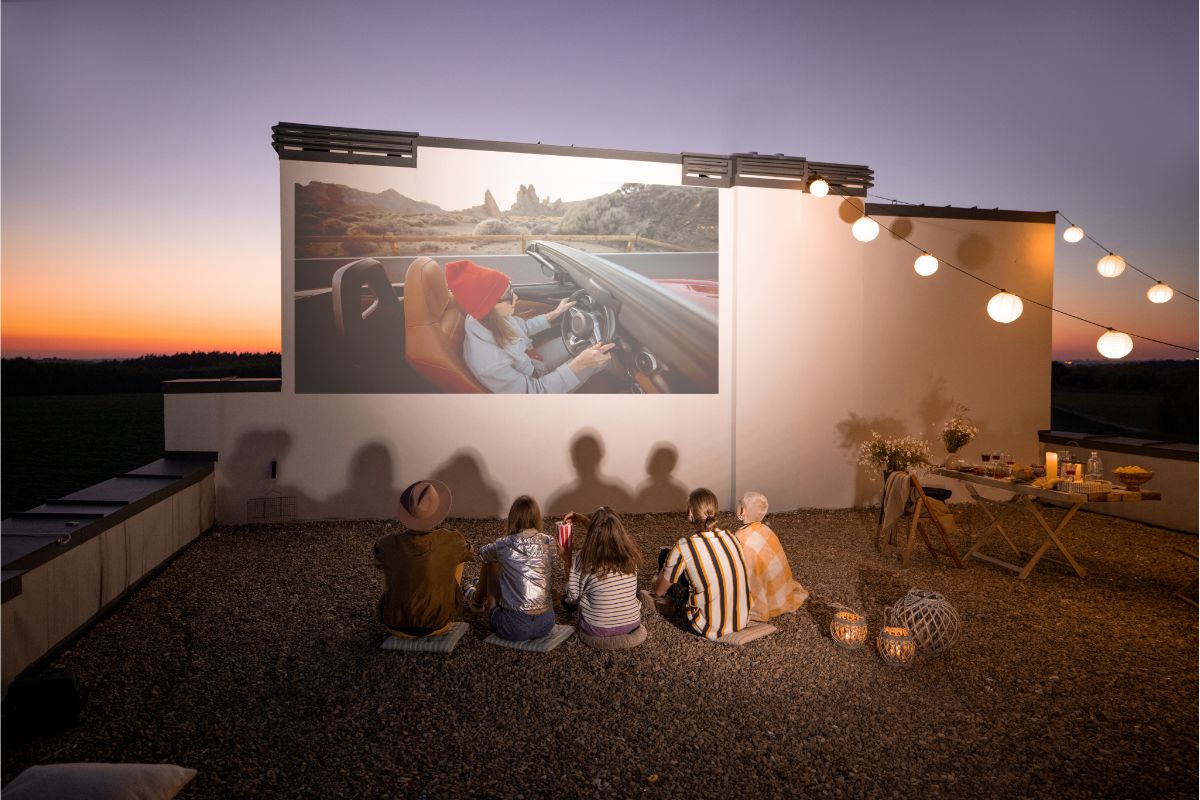
However, having a projector is a fun way to inject some excitement into movie night, but you don’t need to go out and buy an expensive projector to do this.

We hope our article has shown you just how easy it is to project an image onto a wall with a phone or flashlight. 

If you’re into DIY or crafts, building your own projector with your smartphone is a fun, simple project you can do by yourself or with friends. 

Of course, it won’t exactly match the quality of an actual projector, but it’s still a fun way to enjoy movie night. So why not give it a try? You’ve got nothing to lose!

How Many Lumens For Outdoor Projector?

Outdoor projectors are a great way to turn your backyard into your very own outdoor cinema.

However, if you’re planning on using an outdoor projector then it’s important to make sure it has enough lumens to get the job done.

If you aren’t familiar with how many lumens an outdoor projector needs, then it can be hard to know where to even start. Luckily, we’ve done all the hard work for you!

In this handy guide, we’ll take you through how many lumens your outdoor projector needs, as well as the best setup for turning your backyard into a home theater.

What Actually Is A Lumen?

Before we can take a look at how many lumens an outdoor projector needs, it’s important to understand what exactly a ‘lumen’ is in the first place.

Lumens are measurements of visible light, with higher lumens producing a brighter light than lower lumens. 

A single lumen is approximately equivalent to a candle’s flame; meanwhile, a standard 60-watt light bulb will produce around 800 lumens, and an industrial floodlight can produce anywhere from 5,000 to 20,000 lumens.

In projectors, lumens play a key role not just in how bright the projected image is, but the image’s clarity and color intensity.

This is obviously very important when you’re projecting a movie or other type of film, and the number of lumens your projector produces will play a key role in the overall quality of your projection.

This is especially important for outdoor projection. When projecting at night or in the dark, you can get by with lower lumens because there is less light for the projector to contend with.

Meanwhile, you’ll need a projector with more lumens during the day as it will have to compete with natural light sources, and lower-lumen images will end up looking washed out and very difficult to see.

How Many Lumens Should An Outdoor Projector Have?

So now that we’ve taken a look at what lumens actually are, let’s take a look at how many lumens your outdoor projector will need.

Typically, outdoor projectors will range from 2,000 to 3,000 lumens, and some may even go as high as 5,000 lumens.

Around 2,000-2,500 lumens is the minimum required for outdoor projectors – this will let you get a clear and sharp image without any interference from any other light sources (such as the sun or any external lamps or light bulbs).

Any lower than this, and the image you’re projecting can become washed out and unsaturated, and lighter tones, in particular, can be harder to make out if they’re even visible at all. 

If you’re looking for an outdoor projector to watch movies or something similar, then 3,000 lumens is a great baseline to aim for.

This will give you a great consistent picture quality, especially after sunset when the projector won’t have to fight against the daylight.

However, a 3,000-lumen projector can also be used during the day.

As long as it’s not especially bright, these projectors will be able to project their images without interference or issues with contrast or low sharpness.

In general, outdoor projectors work much better when it gets darker rather than during the day.

If you want to use your projector before sunset, then you’ll need a projector that has a minimum of 2,500 lumens (although a minimum of 3,000 lumens is ideal for sharp and clear images).

Otherwise, you won’t be able to use your projector to its full potential.

Similarly, the size of the screen that you’re projecting onto is also an important factor. A larger screen requires more lumens as you’ll have to position the projector further back.

If you want to maintain a sharp image with good contrast, then you need your screen to match the projector. 

A 3,000-lumen projector works best for 12×7 foot or 16×9 foot projector screens, and any larger screens will need a higher-lumen projector to match.

If you’ve already gotten your projector screen, you should choose a projector to suit its size.

What’s The Best Setup For An Outdoor Projector?

What’s The Best Setup For An Outdoor Projector?

Okay – so we’ve taken a look at how many lumens your outdoor projector has. But what exactly is the best setup for your outdoor projector?

The main components you’ll need for your outdoor projector are the projector itself and the surface you’ll be projecting onto.

The best surface for this is a proper projector screen – this will give you the best picture quality without affecting the color and contrast in any way.

However, you can also use a blank, flat wall instead, such as an exterior garden wall or the side of a building.

You’re better off avoiding any surface with inconsistent coloring or texturing; for example, painted walls or fence slats can affect the color and distort the projection, worsening the image you’re projecting.

As mentioned earlier, the position of your projector depends on how many lumens it has as well as the size of the screen you’re using.

If you have a larger screen, then you’ll need to position your outdoor projector further back, and it will require more lumens as a result in order to maintain a clear image.

To avoid shadows and silhouettes obscuring the screen, raise your projector up off the ground and position your seating on either side of the projector itself.

A simple camera tripod is a great way to do this.

No movie experience would be complete without a proper sound system. Luckily, using an outdoor projector makes it simple to create great sound.

Positioning some basic external speakers around your seating area will let you create an easy surround sound effect.

This is even easier to do with Bluetooth speakers, while also removing the need for a bunch of cables lying around the place.

With a bit of creativity and some practice, you can turn your outdoor projector into a great outdoor cinema in no time!

Final Thoughts

So there you have it! Now you know how many lumens you need to make the most of your outdoor projector both during the day and night, as well as the best way to set up your projector for a great outdoor cinema.

Outdoor projectors are the perfect way to turn your yard into your very own home theater – and now that you know how many lumens you’ll need from your outdoor projector, all you have to do now is try it out for yourself!

Enjoy!

How To Connect iPad To Projector

Projector Finder » Blog

Generally speaking, iPad screens are the ideal size for going about our day-to-day lives.

Whether it be catching up with the latest episode of our favorite show, checking emails, playing our favorite games, or Facetiming family, the iPad screen is the perfect size.

However, there are some activities that don’t suit such a small screen.

For example, if you need to deliver a presentation at work, your small iPad screen won’t be suitable, especially when delivering to larger groups.

Luckily for us, we can connect our iPads to a projector before casting the screen onto a larger display.

To help you connect your iPad to a projector, in this post, we will show you the quickest, easiest, and most hassle-free ways you can connect the two devices.

If this is something you need to learn, be sure to keep reading!

Connecting Your iPad To A Projector Using A Cable

If you already have the right equipment, by far the easiest way you can connect your iPad to a projector is by using a cable.

You can do this by making use of the cable ports your projector should already have.

Usually, a projector will have an HDMI and VGA port. If your projector has either of these, you will be able to effortlessly connect the two devices.

Out of the two types of cables, your best option is probably an HDMI cable.

The reason for this is pretty simple. HDMI cables support audio and videos, whilst VGA cables don’t. VGA cables only support video.

For this method to work, you first need to make sure you have an adapter that lets you connect the cable to your iPad. You can find plenty of options on Amazon.com.

It is worth noting that you’ll need the right type of adapter depending on your iPad. Most iPads have lightning ports, therefore you’ll need a lighting adapter.

Some newer models might have a USB-C port, so you might need a USB-C adapter instead.

Once you have the adapter and one of the cables, simply put one of the cables into the projector and the other end with the adapter into your iPad.

All you need to do then is select the right source on your projector if the projector hasn’t already done it for you.

Connecting Your iPad To A Projector With One Cable

Depending on the type of iPad you have and the make of the projector, it is also possible to connect your iPad to a projector without needing an adapter.

For this to work, you’ll need to own an iPad with a USB-C port. The projector will also have to have a USB-C port.

As a result of needing a few things to come together perfectly for this method, not many people actually use it.

However, if you’re one of the lucky individuals who own both devices that are compatible with USB-C ports, connecting the two devices takes a matter of seconds.

If you’re looking for a projector or iPad that has USB-C port capabilities, you will want to look carefully for the right model.

Newer models of iPad tend to have a USB-C port, so you would need a double-ended USB-C cable for this method to work.

If you don’t have one, simply look for an older model of iPad that has a lighting port.

Projector brands like ViewSonic tend to include a USB-C port in their projector’s design so you might want to check them out first.


To connect the two devices together, simply insert the USB-C end of the cable into your projector and the lighting end of the cable into your iPad.

If you own a double-ended USB-C cable, simply insert one end into the iPad and one into the projector.

The projector should then display your iPad screen for you.

How To Wirelessly Connect Your iPad To A Projector

It is also possible to wirelessly connect your iPad to your projector. This method is handy because cables can get quite restrictive at times, particularly when delivering presentations.

Connecting your iPad wirelessly also prevents you from having to carry around cables with you to the office.

To connect your iPad to a projector wirelessly, you will have to spend some money though, unless you already have an Apple TV box.

For this method to work, you will need an Apple TV box and an HDMI cable.

If you don’t have an Apple TV box, you will have to follow a different method. You can buy an Apple TV box on Amazon.com.

When you have the Apple TV box and an HDMI cable, first connect the two to the projector.

To do this, insert one end of the HDMI cable into the HDMI port on the Apple TV box. Insert the other end of the cable into the projector’s HDMI port.

Once that’s done, you should plug the Apple TV into a power source and turn it on.

If Apple TV isn’t automatically displaying on the projector, search for it in the source menu and select it.

Now, you need to make sure the iPad and Apple TV are connected to the same WiFi.

When they are, you can swipe up on the bottom of your iPad screen to reveal a menu that says ‘screen mirroring’. All you need to do now is select the Apple TV option.

Final Thoughts

In this post, we have shown you three different ways you can connect your iPad to an Apple TV.

While the methods differ slightly, they are all quite similar in the respect that they all require specific pieces of electrical equipment to work.

Before you read the three methods, did you realize just how easy it is to connect an iPad to a projector? If not, hopefully, you do now.

Now all you need to do is select the method that suits you best and get your iPad connected to your projector.

How To Connect Soundbar To Projector

Projector Finder » Blog

Projectors are a nifty piece of equipment to have around the home.

Whether you want to make your living room feel like a cinema or deliver a presentation in the office, they come with lots of neat features that provide us with endless possibilities.

Projectors can also be connected to a variety of other electrical appliances such as an iPad, smartphone, and laptop, but did you know that you can also connect your soundbar to your projector.

Connecting your soundbar to a projector enhances the sound of whatever it is you’re watching, so it only makes sense to do it.

There are many different ways you can connect a soundbar to a projector and we want to show you the best.

In this post, you’ll find everything you need to know when it comes to connecting the two devices quickly.

Let’s jump straight in!

The Options We Have Available

Soundbars and projectors come with a wide range of different connectivity options.

Each projector will come with a number of audio and video inputs and outputs that allow you to connect devices.

Your soundbar will also have a variety of ports that allow you to connect the device to other devices.

Thanks to these connectivity options, we have an array of options to choose from when it comes to connecting both devices.

However, you will want to find the best one that suits your needs and requirements best.

To do this, you need to understand the different types of connections we can use. By understanding this, you can choose the option that gives you the best results.

Below, you’ll find the different connectivity options we can choose from.

HDMI

HDMI cables are incredibly versatile, allowing us to connect most devices together in a matter of seconds.

Most commonly used to connect a games console to a TV, the HDMI cable can also be used to connect your soundbar to a projector.

You can expect high levels of audio quality when using this cable.

SPDIF

A SPDIF cable is a type of digital audio cable that utilizes a TOSLINK or RCA connection.

The audio quality from this type of cable is also very good. This option is usually the top pick when a soundbar doesn’t have an HDMI port.

Bluetooth

Bluetooth doesn’t require any cabling or wires to connect your soundbar to a projector.

Instead, it uses a wireless connection to connect the two devices. This can come in handy when you don’t have the necessary cables at hand.

For this option to work, your projector and soundbar will need Bluetooth capabilities.

Connecting Your Soundbar And Projector Using An HDMI

Using an HDMI to connect your soundbar to your projector is by far your best option.

Offering the best sound quality across two different audio channels, the method used to connect the two devices with this cable is also incredibly easy.


It is worth noting, that for the HDMI cable method to work, your projector will need an HDMI port (output) and your soundbar will need an HDMI input port.

Follow the steps below to connect the two devices:

  1. Make sure your projector and soundbar are both turned off.
  2. Insert one end of the HDMI cable into the output port on your projector.
  3. Take the other end of the HDMI cable and insert it into the input port on the soundbar.
  4. When that has been done, you can connect your media device. This could be a laptop, phone, iPad, or Blu-ray player.
  5. Turn all of the devices on.
  6. The two devices should now be connected. All you might need to do now is set the projector’s audio settings to HDMI (output) and the soundbars audio setting to HDMI (input).

Connecting Your Soundbar And Projector Using A SPDIF

Next, we have the SPDIF method. SPDIF is a type of digital connection, needing TOSLINK or RCA connections to work.


This method is the one most people turn to if they realize their projector or soundbar doesn’t have an HDMI port.

Before you use this method to connect your two devices, it is important to check the input and output of your soundbar and projector.

Doing so will confirm whether or not the two devices are compatible.

It is good to know that SPDIF is capable of using round RCA connectors and square TOSLINK connectors.

Follow the steps below to connect the two devices:

  1. Ensure both devices are turned off.
  2. Insert the end of the TOSLINK or RCA connector into the output port on your projector.
  3. Insert the other end into the input port on the soundbar.
  4. You can now connect your media device or devices to the projector.
  5. Turn on your devices.
  6. If required, change the audio output on your projector to optical, SPDIF, or digital output and put the soundbars input into the necessary input port.

Connecting Your Soundbar And Projector Using Bluetooth

If the soundbar and projector both offer Bluetooth capabilities, you could quite easily connect the two without any cables at all.

Cables can be quite restrictive, so removing them completely makes life a lot easier, especially if you’re presenting at work.

The sound quality isn’t always as good with this method, but if you need a quick fix it can be ideal. Just be prepared to experience some inconsistency.

Follow the steps below to connect the two devices:

  1. Start by turning your soundbar on and enabling the pairing mode.
  2. Head to the settings on your projector, enable the Bluetooth function, and search for your soundbar.
  3. On your soundbar, accept the request to connect the two devices.
  4. If required, enter the pairing code.
  5. The two devices should now be connected. In the future, they should automatically connect when Bluetooth is enabled.

Final Thoughts

There you go, three quick and easy ways to connect your soundbar to a projector.

Hopefully, now you’ve made your way through the three methods we have discussed, you should know exactly how to connect your two devices.

Using an HDMI cable is arguably the best way to connect the two devices, but if you don’t have one in the house, the two other methods are perfect.

Now all that’s left to do is dig out your cables or enable Bluetooth and get your soundbar and projector connected.

Following our methods precisely will have you all set up with high-quality audio in no time.

How To Make A Homemade Projector With A Mirror

Projector Finder » Blog

Believe it or not, you don’t necessarily need to cash out hundreds of dollars on the latest and greatest projector in order to enjoy a home cinema experience.

With a little imagination and careful planning – It’s possible to create a DIY projector from the comfort of your very own home…and we’re here to show you how!

Homemade projectors are a quick viewing solution that can be set up in a matter of minutes, and can be a great way to continue enjoying your favorite tv shows and movies on the big screen, and the best part?

You’ll only need a few items to put it all together.

This is where we come in to lend a helping hand!

Regardless of whether you happen to be on a budget or you simply want to try your hand at making your very own projector, just keep reading four of our simple and easy-to-follow instructions on how you can make a projector with a mirror.

How To Make A Homemade Projector: Step-by-Step Instructions

Gather Your Supplies

First things first, just like with any other type of DIY project, you’re going to want to begin by making sure that you have all of the supplies you’re going to need to make your homemade projector.

Here is a quick breakdown of what you’ll need:

  • A mirror (small-medium sized)
  • Smartphone
  • Magnifying glass
  • Cardboard box
  • Scissors
  • Glue
  • Matte black paper
  • Tape

Prepare The Cardboard Box

Once you have gathered all of the supplies that you are going to need to make your homemade projector, you are then going to need to begin preparing your box so that the mirror can slot inside.

Take your cardboard box (ideally, we recommend that you choose a shoebox as this is a perfect size) and cut out the two cardboard flaps located on the top of the cardboard box.

This will allow you to easily access the interior of the cardboard box that you are using without any restrictions. We recommend keeping the pieces that you have cut.

Darken The Interior

After you have cut the cardboard box, you can then go ahead and darken the interior of the cardboard box by using the matte black paper that you have gathered.

To do this, take the paper and use your tape to attach the black paper to the interior of the cardboard box until it has all been covered.

This is the quickest and most efficient way to darken the interior of your cardboard box, however, keep in mind that you can do this any way that you like.

For example, if you do not want to use matte black paper, then you could alternatively choose to use something such as black paint.

However, keep in mind that if you want to use paint to darken the interior of your cardboard box, then you are going to need to give the paint the appropriate time to dry before you proceed to the next step.

As a side note, if you are using dark paper to line the interior of your cardboard box, then you should be sure to use matte paper over glossy.

This is because glossy paper might actually cause the projection to become blurry.

Create The Lens

Now that the cardboard box is ready, you can then proceed to create the lens. To do this, take one of the cardboard pieces that you previously cut and make a small hole in the middle.

To do this correctly, take your chosen magnifying glass and place it over the top so that you can cut a hole that fits your magnifying glass.

Once you have done this, pop out the lens from the magnifying glass and insert it into the hole to create the lens.

Your lens is going to need to be propped up inside the larger cardboard box, so you’re going to need to stabilize it.

To do this, we recommend that you take the leftover black paper and fold them to create a rectangular shape.

Once you have done this, you can then go ahead and tape it to the back of the lens, and this will help to create a box/rectangular shape.

Countdown Three

Make The Mirror

Next up, you are going to need to make the mirror to complete your projector.

This is super simple, as all you are going to need to do is simply insert the mirror you have chosen directly into the large cardboard box.

Ideally, we recommend that you position the mirror towards the back of the box so that it is aligned with the lens that you previously placed inside the box.

For the best results when you start to project, we recommend that you place the mirror at around a 45-degree angle, although this is entirely up to you.

Set Up Your Phone!

Last but certainly not least, the final thing that you are going to need to do is to set up your smartphone so that you can begin playing your favorite tv show or movie.

To do this, you are going to need to carefully cut a hole inside the lid of the cardboard box.

However, be careful that you do not cut a hole that is bigger than your phone, as you don’t want your phone to accidentally fall inside the box, instead, you want it to be elevated above the lens and mirror for the projector to work.

Once you have done this successfully, all you are going to need to do is simply close the lid and place your phone on top of it.

Then, you will be able to begin projecting your favorite tv shows and movies!

Wrapping Up

There we have it! As you can see, creating a homemade projector from scratch is pretty easy to do, and by following these steps we have shared, you’ll have your very own projector in no time at all.

Thanks for reading!

How to Set Up Movie Night?

Projector Finder » Blog

This isn’t your ordinary movie night that occurs each night you turn on the tv! This movie night is a special occasion that feels like it’s taken hours of planning. When, in reality, it only took a few minutes, the perfect snacks, and some friends or your significant other to make it a party. 

Below, you’ll find details on how to turn a regular movie night into one that you’ll never forget!

1. What movie is worth watching? 

Choosing the movie is one of the most important aspects. It sets the tone for the whole movie party. You may be tempted to pick your favorite movie, but choosing an option everyone will enjoy is key. For example, if you’re planning a romantic evening, you’ll want to enjoy a romance or a romantic comedy. Perhaps a fun animated movie is the best choice for a family event. 

It’s important to carefully consider what atmosphere you want to create during this evening event. The good news is that there are plenty of genres to choose from that will help perfectly set the scene for your special movie night. Horror, sci-fi, romance, drama, you’ll have plenty of options available. 

Having streaming services has made choosing a movie much easier, as you’re presented with more options within each genre. Some of the most popular streaming services you may choose from include:

  • Netflix
  • Amazon Prime/Prime Video
  • HBO Max
  • Hulu
  • Disney Plus
  • Sling TV

2. Projector or TV?

Sure, you could watch TV like every other night. Or, you could purchase a projector to make your movie nights even more magical. While purchasing a projector may strike fear into your heart, or at least worry into your wallet, it’s worth noting that more budget projector options have become available in recent years. 

Regardless of your budget, you’ll have plenty of options available. 

Projectors not only create an experience closer to the movie theater, but many of them are also easily portable so that you can take your movie night to the backyard, rooftop, etc. Whereas TVs can’t be shifted to these additional locations. Plus, projectors offer a larger big screen to watch a movie on, so you’ll be more immersed in the experience.

Additionally, you may not need an actual screen. Many people hang up white sheets to use as a movie screen. It will work just as well when you stream from your mobile device to the projector and your homemade screen.

3. Snack Time! 

You can’t have the perfect movie night without snacks! Of course, the first snack that pops into mind is popcorn. While you can throw a bag into the microwave and call it a day, having snacks that correlate with the theme can take movie night to the next level. 

You may even want to consider cooking the popcorn on the stove and creating different versions like herbed popcorn or kettle corn for a fun twist on this classic movie night snack. 

One of the best options for a romantic night is creating a charcuterie board or a cheese board that pairs well with your favorite type of wine. Try making a fruit platter for a girls’ night and pairing it with tasty cocktails.

You can also make the food fancier for a date night or girls’ night. Creating a DIY taco station is a great way to do so. As a tip, using Knives Academy options will help you create the perfect slices of meat for the tacos, and slice your cheese properly. 

Use the atmosphere you’ve created with the movie choice and viewing area to inspire your snack options. Watching a French film? Try serving croissants and hot chocolate. 

4. Location, location, location

A huge part of crafting a movie night is choosing the perfect location. For a romantic night, you may want to set up a portable projector and a Bluetooth speaker in the bedroom for the optimal cuddling spot. 

Or, maybe you can have a backyard movie night in your own backyard. This outdoor movie night can be turned into a romantic picnic with string lights and a blanket. It’s cozier than heading to an outdoor movie theater. Each location helps reinforce the theme for the occasion. 

Below are some options to choose from to help set the mood:

  • Couch for a more relaxed vibe
  • Bedroom/mattress for a romantic evening
  • Backyard for a get-together, family movie night, or romantic evening
  • Kitchen so you can create food while watching a food-centric movie
  • Makeshift fort for a dreamy or child-friendly movie night.

5. Dress Code

If you’re cozying up with your significant other or your kids, pajamas are typically the best dress code options. However, if you’re hosting a larger movie night, you might want to consider dressing according to the movie choice and atmosphere. 

For example, if you’re watching a romantic movie, wearing a dress or nicer jeans and top will make you feel more like you’re on a date. 

Using the above tips, you’ll be prepped to have one of the best movie nights! A little forethought and planning make a huge difference in creating the appropriate mood. Put together your outfit, the snacks, set up your projector, and you’re already on your way to a special movie night that you and your loved ones won’t soon forget.

Check out our guide on How To Make A Homemade Projector With A Mirror